Making plugin development easy by harnessing the power of development containers and CI/CD.
If you’ve ever started looking into Nuke plugin development, chances are you felt swamped in the setup steps before you could actually start developing. You’ll need to install the right Nuke versions you like to build to. Then you’ll need to have the right system to get the correct GCC version, required dependencies, etc.
But what if I told you there is a much easier way? Only install two things once? And then be able to start developing and building right away with it? I promise, it is possible! ✌️
A quick note: this guide is targeted at setting up a development environment on all operating systems and compile using CI/CD. However, on Windows during local development you can only compile for Linux. This is due to “Development Containers” only supporting Linux containers. This might change in the future. If you’re already into plugin development, chances are you’re already developing on a Linux/MacOS system: an ideal choice. In the end as mentioned, using CI/CD we will also compile the plugins for Windows, Linux and MacOS.
For the ones in a hurry, at the bottom of this page there is a TL;DR
Software we are gonna use
Before we can start building our plugin, we need two things (as promised).
Note: if you use Linux, feel free to just install Docker without Docker Desktop. It will work fine. On MacOS you can also use Colima (which I use myself).
This guide is written for VSCode. However, a lot of programs support Development Containers. Such as CLion. For a complete list it is available here: devcontainers.dev.
And you don’t need to worry about versions! Just pick the latest. I’ve added links to the installation guides, which should be straightforward.
If you’re not interested what all of this is, just skip the explanation part and go right into how to use it. However for the ones that do like some explanation, please continue reading :)
What is this software?
You probably know Visual Studio Code. It basically is just a text-editor that has extensions available. It really is powerful for whatever you want to do. It supports any language and has a ton of extensions available. So you can customize your experience quite a lot.
Difference between Visual Studio and Visual Studio Code
You’ve might seen in guides mentioning Visual Studio as well. This is a different application actually. Visual Studio Code is a text editor. Visual Studio (without Code) is an IDE and is able to compile stuff. We don’t need that. That also requires you to install the correct versions per Nuke version. Which is a lot of work to setup each time.
Docker
You might have read something somewhere about Docker, but probably not in anything Nuke related.
I’ll illustrate it really really simply. Docker basically makes it possible for you or me to prepare a system, pack everything into one image, and ship that.
Well, that’s the short extremely simplified explanation, below I’ve added a little bit more technical explanation. However: if you prefer some more detailed explanation, please look into some articles or videos online!
Technical details
Docker basically allows you to run applications isolated. These are called containers. Containers are running on there own, and can’t do anything outside their own container.
You can run multiple containers on your system, each doing its own thing. You might think, that sounds like a virtual machine to me. Yes, that is a common misconception. Containers are fundamentally different in that its not virtualizing anything. It is running the application like it would on your own system. While with virtualization it really is isolated from the host, so that it can run Linux for example on a Windows machine.
Below you can see a visual comparison between a virtual machine setup and a docker setup (courtesy to Docker for the image).
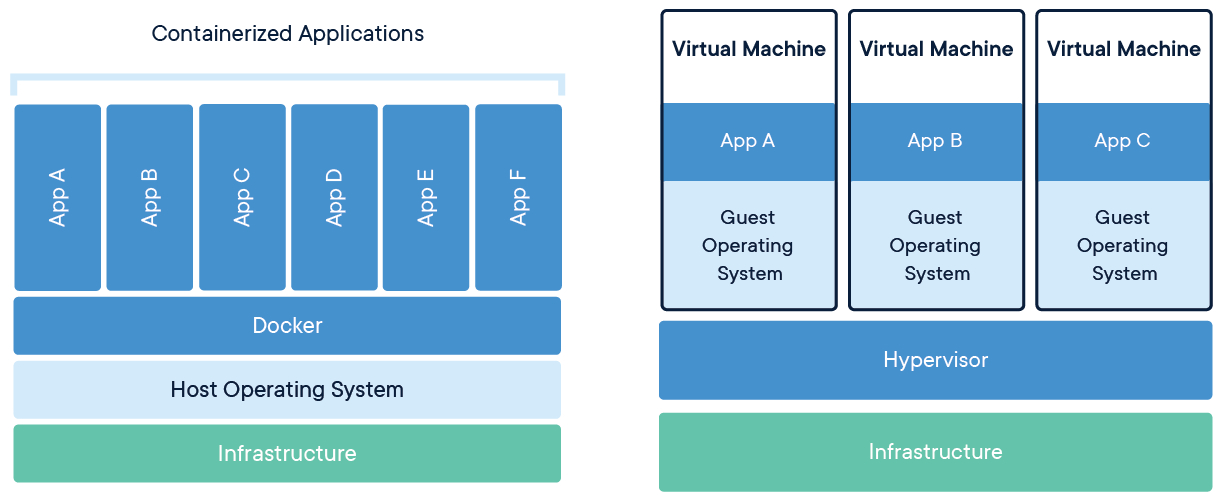
With Docker, you can only run Linux containers on a Linux host. And Windows containers on a Windows host (or with WSL you can also run virtualized Linux containers on a Windows host).
Why is this useful?
Well, containers can be prepared to run a certain goal. A docker image can have all dependencies and software required prepared to be able to fulfill its goal.
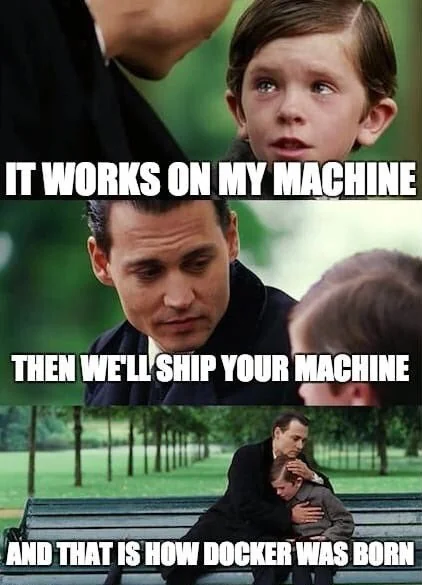
For developers this is nice, as you don’t have to install anything yourself if you all use the same image that has been prepared. Each container has its identical state. You won’t run into “it runs on my machine” anymore. If it runs within Docker, it will run anywhere.
NukeDockerBuild
I’ve developed a script that automatically builds all Docker images per Nuke version. This also includes all the tools that are necessary to build a plugin. If you’re interested to what this all is, feel free to visit the repository.
Currently it creates images for Linux, Windows and MacOS (both ARM and x86). Thus making it possible to compile for all operating systems.
It automatically grabs all available Nuke versions and builds an image per Nuke version to the specs that are needed for building. This includes Visual Studio versions, Xcode SDK, GCC dev toolsets, dependencies, base system, etc. This all means you don’t need to do that yourself or care about it at all.
These Docker images are excellent for developing, as all software and dependencies are already prepared for you.
We will configure Visual Studio Code to work with this nicely.
Enough info, I want to start developing my plugin!
Fair enough, lets prepare your Visual Studio Code. Go to the extensions tab and install the Dev Container extension.
This extension allows you to run containers based on the code that you’ve opened.
For the ones wanting to compile for MacOS, please make sure you are working on Apple hardware
And that you’ve read and understood the Xcode license agreement
As these are Linux images that are able to cross-compile for MacOS, this should only run on Apple hardware.
Besides that, you also agree on the Foundry EULA by using their software.
Then to make it easy, I’ve prepared an example project to start right away. Download, fork or clone my example project for Nuke plugins here: https://github.com/gillesvink/NukePluginTemplate. Open that cloned folder with Visual Studio Code.
Now we need to change the configuration to set your operating system. Go to the folder .devcontainer and open the file in the folder that is named to the target you’d like to work on: devcontainer.json.
Which one? So for example I am on an M1 MacOS laptop, and I have Nuke 14 installed locally. Then I choose macos-x86 as Nuke 14 only supports x86. If I have Nuke 15 installed, the M1 native version, then I choose macos-arm. Or, for a weird reason I am on an Intel based Mac, and I like to test on my M1 laptop, I choose macos-arm even on that Intel Mac. (As its able to compile for anything). Or I am on my Windows laptop but I’d like to test on my Linux (vm) machine. Then choose Linux.
Or I am on a Linux machine, then I just choose Linux :)
The file will look something like this:
{
  "build": {
    "dockerfile": "Dockerfile",
    "args": {
      "NUKE_VERSION": "15.0"
    }
  },
  "customizations": {
    "vscode": {
      "extensions": [
        "streetsidesoftware.code-spell-checker",
        "twxs.cmake",
        "ms-vscode.cmake-tools",
        "ms-vscode.cpptools",
        "ms-vscode.cpptools-extension-pack",
        "ms-vscode.cpptools-themes"
      ]
    }
  },
  "forwardPorts": [
    3000
  ]
}
Set image version
Change the NUKE_VERSION to the version that you want to test locally. (This will be compiled for Linux or MacOS).
Now, you can also specify which Nuke version you want to work on. This can be any available Nuke version from 13+. If you for example have Nuke 14 installed locally and would like to test your plugin there, change it to 14.0 (or 14.1, etc). (For all available versions check the table at https://github.com/gillesvink/NukeDockerBuild)
Optional: set additional extensions
You can specify which extensions the container needs to have. This can be done by adding extension ID’s to the extension key in the configuration. I’ve already added everything you need for the Nuke plugins.
Congrats, that’s it, everything is set-up! 🎉

Running the development container and building your plugin
Open the Command Palette by pressing ctrl + shift + p or cmd + shift + p and type “reopen in container”. This will open the current folder in the container.
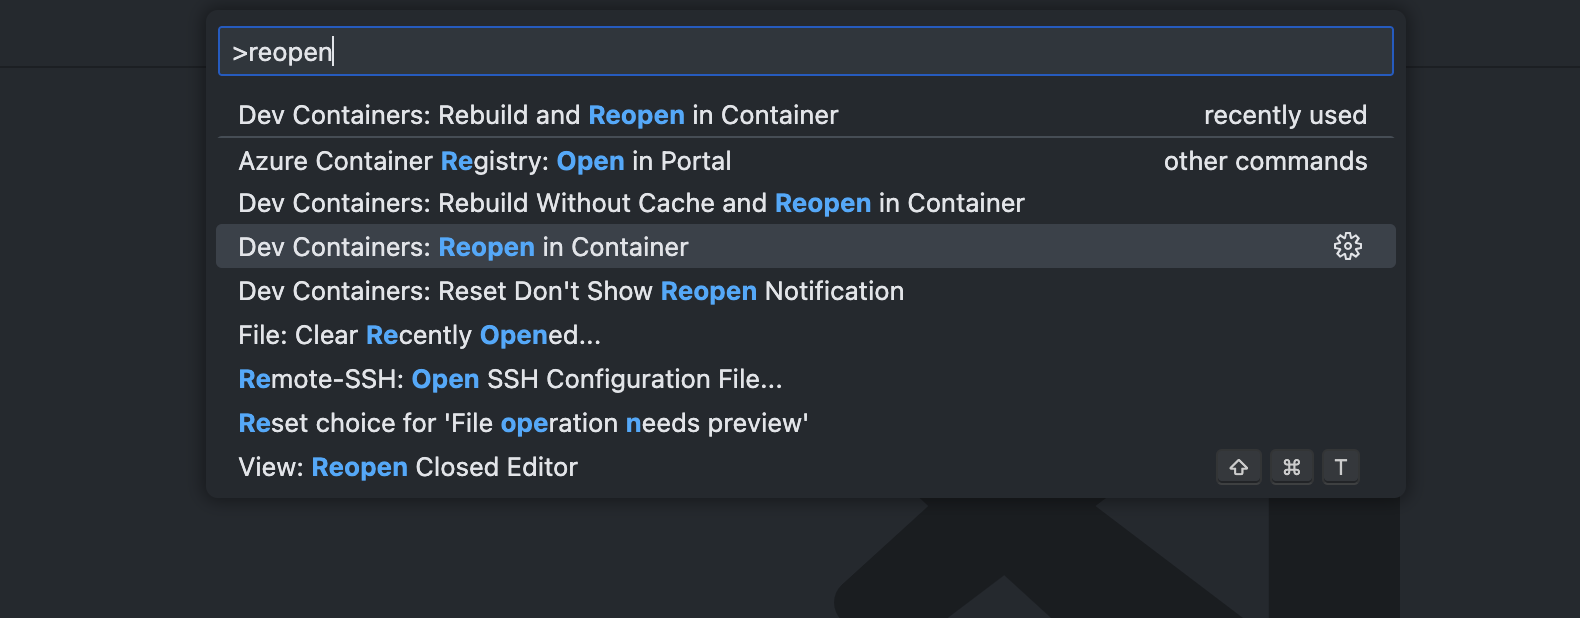
This will create a container on your machine automatically. It might take a minute for the image to be downloaded, but then once everything is opened you are good to go :)
Next time you do the same thing, you don’t need to wait for the image anymore is its then downloaded. Only the first launch takes a while.
You can see this in the video where I do the same thing. I had the image downloaded already so it is a bit quicker. Within 36 seconds the devcontainer is created and I built the plugin for MacOS Nuke 14 on an ARM Macbook.
This is literally the same as having everything installed manually, like extensions in Visual Studio Code, correct devtoolset, correct SDK and deployment target, all the installed dependencies and an installed Nuke. But now that is all handled within this container, and you didn’t have to.
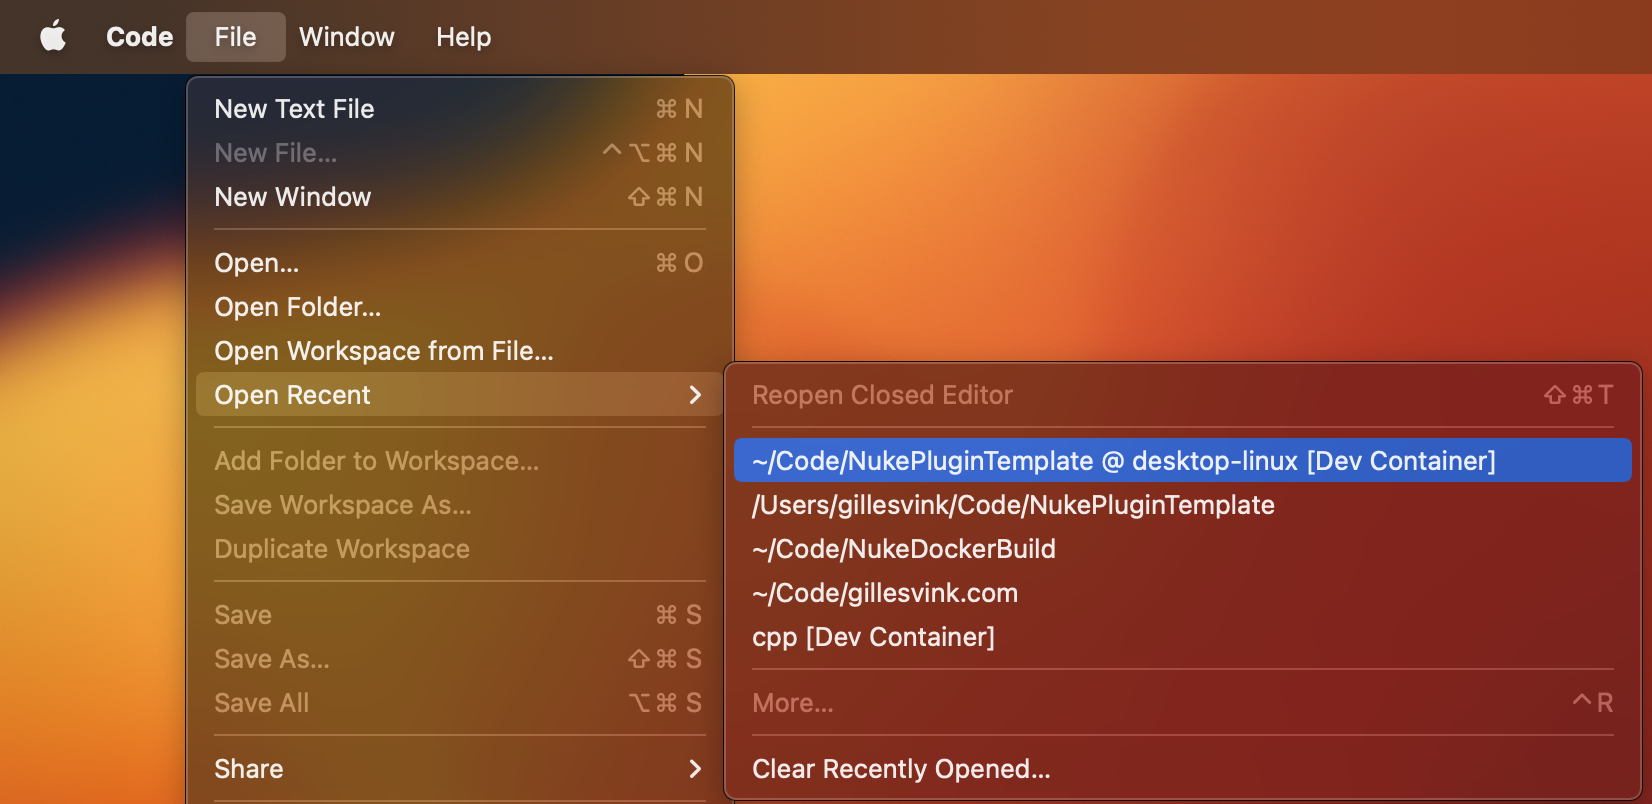
You can always reopen the container by going to the recent files and just open it as a normal folder. This way you jump right back into your dev container.
Native Windows Development Container
It is possible to do the same using Windows Containers. As the images are built for Windows as well. Unfortunately it is a bit more complicated as the Dev Containers extension currently does not support Windows. If you’re experienced with containers a workaround could be to run the container yourself and then SSH into the container in VSCode. Or install a VSCode Dev server and connect to it. This would roughly give the same experience. If you’d like Dev Containers to support Windows as well, definitely give a thumbs-up to the issue.
Autocomplete
Yes, it even has autocomplete with all Nuke source files included. No need to configure anything!
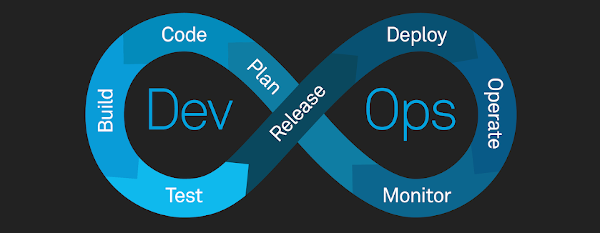
Building with CI/CD
Which means Continues Integration/Continuous Deployment. It is a term used to describe a process that runs according to the configuration of a repository.
What is it?
To simplify it: you can automate all processes that are usually done manually. This includes automatic testing your code, creating releases, building plugins, testing, etc. And yes! I mentioned building plugins. Using the images from NukeDockerBuild we can automate all building for all Nuke versions we want to build to. This means that for example if we push our code to Github, we can trigger the building automatically.
Below you can see an image that illustrates the process nicely.
Getting started
It is recommended to fork the NukePluginTemplate repo. As this repository includes the example CI/CD pipeline already set-up. You can also download the repo and push it as your own (if you want it to be private 🕵️).
The great thing of Github is that it offers free CI/CD runners. These are machines that are available to run your code. For public repositories it is completely free without limits. For private repositories you get 2000 minutes of machine/compile time each month. However keep in mind that if you run it private, there is a multiplier rate for MacOS and Windows. As when I’m writing this for Windows it is 2x and for MacOS 10x. So 1 minute compile time on MacOS counts as 10 minutes.
You can also choose alternatives, like CircleCI or Azure Pipelines. They all provide something similar.
You can also run your self-hosted runners for your own private Gitlab/Gitea, or link it to Github. Sooo many options.
Building
I’ve configured the process to run on each push. So if you adjust the code and push it, it will run on Github. You’ll see an indicator on the repository that shows that the action is running. Quick idea: try to make the multiply node do its multiply calculation exponentially and push it.
If you go to the actions page, and click on the current running item, you will get an overview of what currently is being done.

Well, basically that’s it! You are building the plugin for both all operating systems at once. Just get a coffee and wait ☕. You’ve deserved it :)
I got my coffee, and the build is showing green, how can I check the results?
First of all: good that you’ve got your coffee.
To check your results, go to the action page and the job that is finished. If you scroll down to artifacts, you can see everything that is produced during this build.
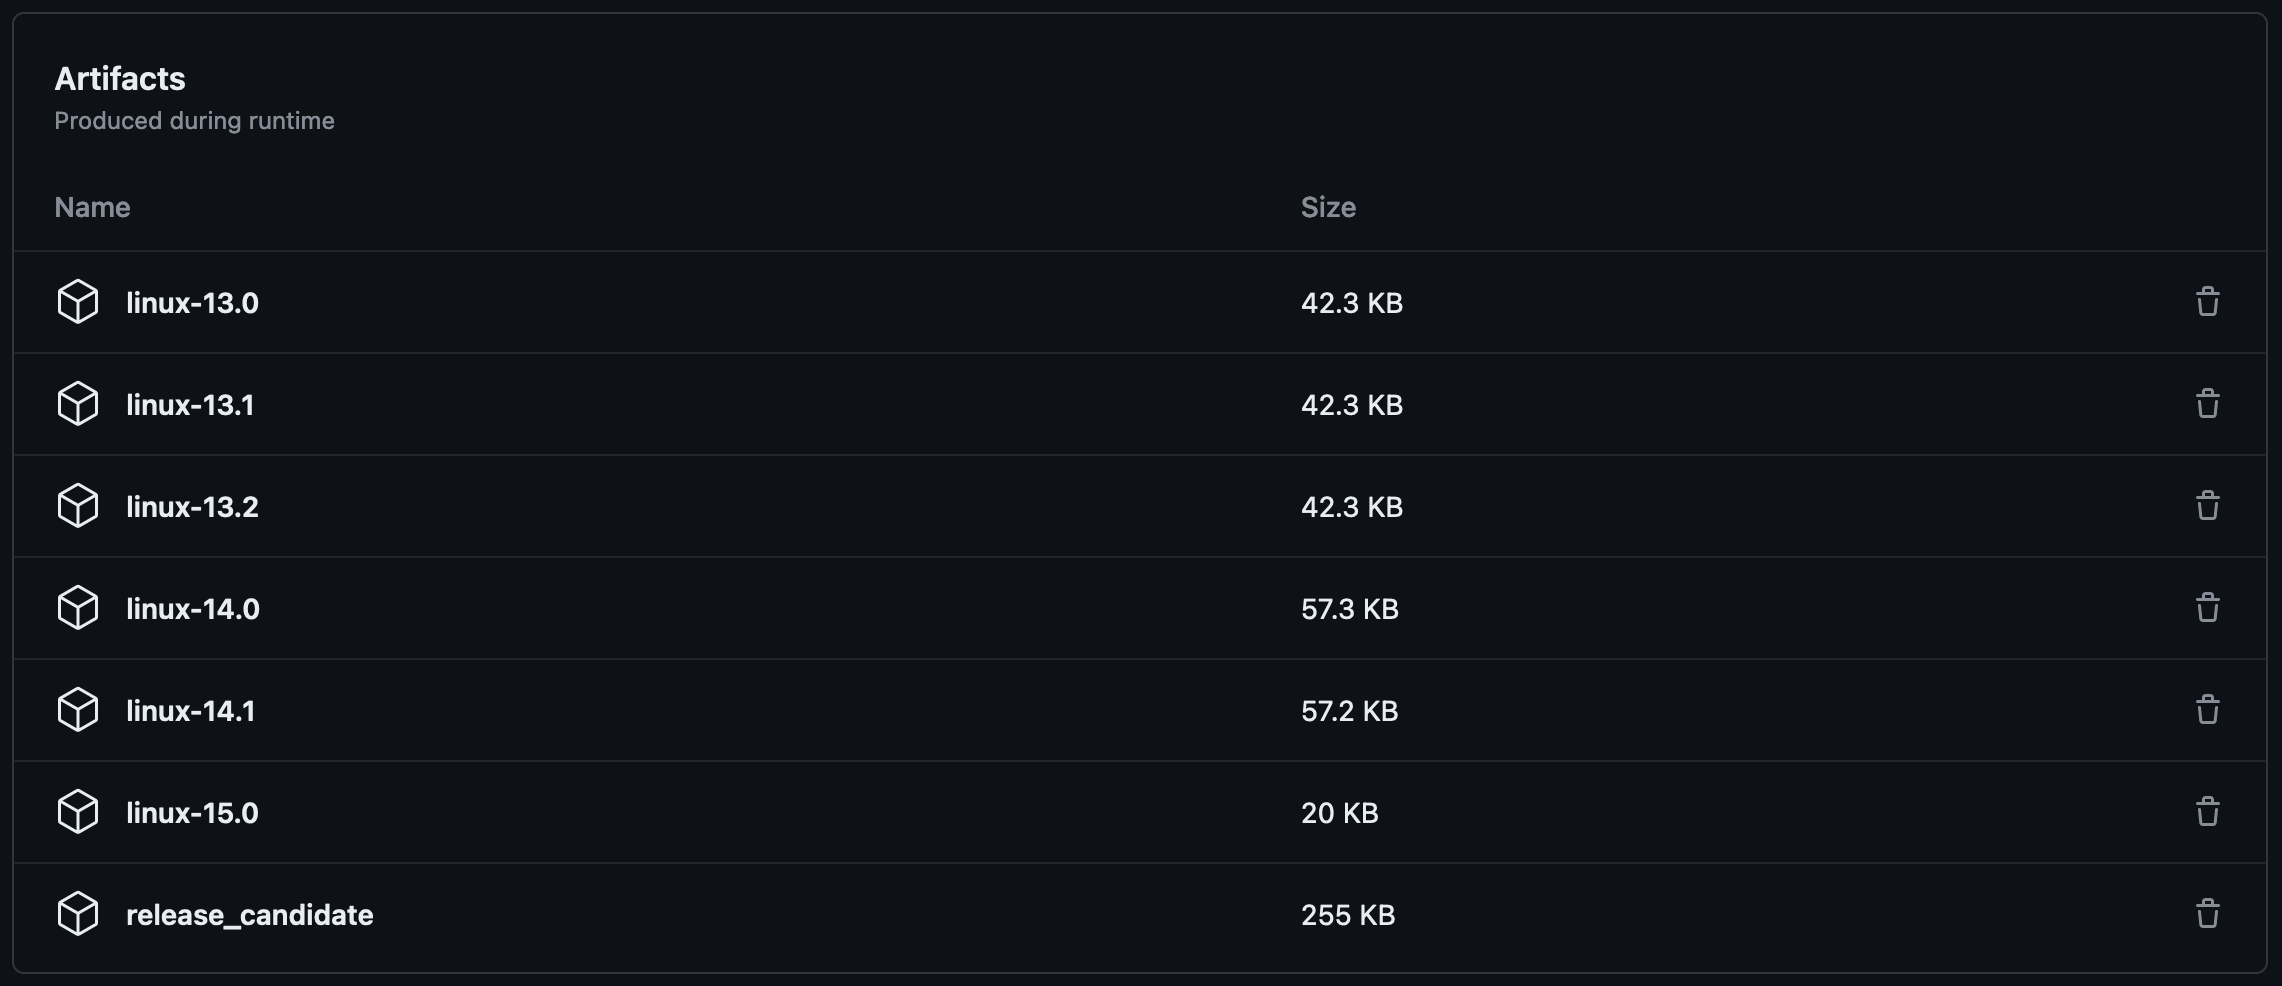
You’ll see the artifacts for Linux. Produced per version. You can download those and get the compiled file. However there also is the release_candidate. This includes all compiled files and grouped per version. This would be the one you want to ship eventually.
Releasing & building for MacOS and Windows
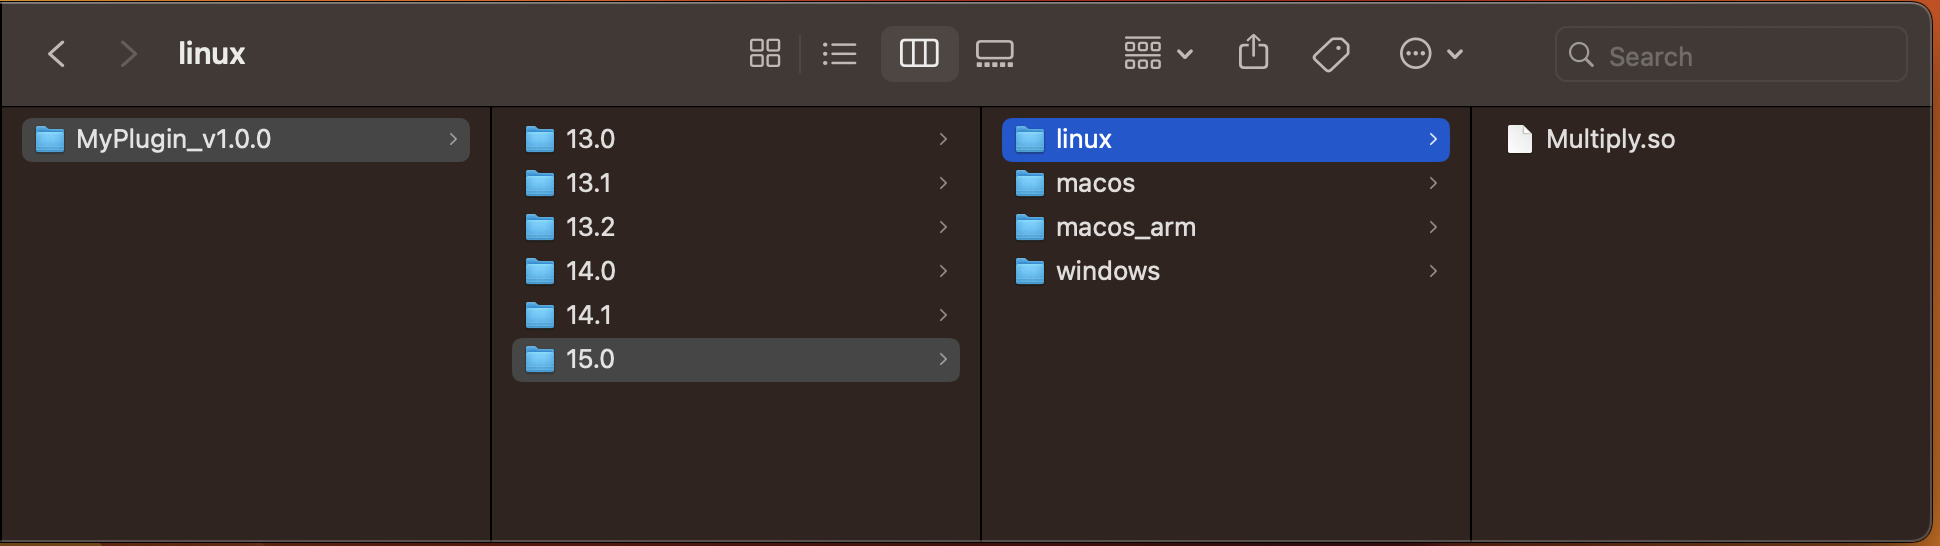
The process is also automated to build on tag change. So if you create a release on the Github page for your plugin, it will trigger the building process as well. Additionally, it will put the release_candidate to your release as a zip. This way others can download the associated version easily. (In this example it is called MyPlugin_v1.0.0.zip)
In the current template, it will only build for MacOS and Windows when this release is created. However, you can customize that in the build.yaml file.

Specifying Nuke versions to build to
This can be specified in the workflow file. Go to .github/workflows/build.yaml. Here you see a few jobs. You can specify per Linux and Windows which versions you’d like to target to.
strategy:
  matrix:
    nuke_version: ["13.0", "13.1", "13.2", "14.0", "14.1", "15.0"]
  fail-fast: true
Currently everything is added, but in the future more Nuke versions will of course be available. Once again, check NukeDockerBuild for the available versions.
Optimizations
The current setup is optimized that it only runs Windows and MacOS builds if there is a new release made, as these builds take a lot longer (due to the Windows images being large and MacOS running Linux in a virtualization), Linux builds and pulling the image together only take around ~18 seconds. This way it these Linux builds can serve as a simple test to see if your builds would succeed.
Of course, you could also only run one Windows and Mac build. This CI/CD workflow really serves as a starting point to customize to your specific needs.
Github has a large documentation available for making adjustments.
TLDR
Thanks!
That’s it, thanks a lot for reading this post, it’s my first one. I hope you’ve enjoyed it!
If you like this approach, please give it a star on Github: NukeDockerBuild on Github
, I really appreciate it ⭐
And if you have any questions, ideas or have some feedback, or would like to share what you’ve made using it: feel free to reach out to me!
As a next step, definitely read the NDK which is a great place to start learning about the possibilities of Nuke plugins. Besides that, there are great guides available for writing your first plugin.
Cheers, and have fun developing 😁